Managing your Rates - Charges Tab
Use the Charges tab to:
- View your rates. You will find a list of every rate you entered on the Charges tab.
- Change rates. Editing a rate does not affect existing claims. The new rate will be applied to new claims after the change.
- Setting future base rates. Rates changing in the future? Set the new rates and apply the future date. When the date arrives, the system will start using those rates.
- Create categories. If you need a grouping of rates that are different from your base rates, you can create a charge group (category) that contains those rates. When you create your first category, you will see that the system automatically moves your base rates into a grouping called the Universal category.
- Temporary rates. Create rates to use from a start date to an end date.
- Itemize supplies. If your company decides to bill a patient or payer for each supply, you can itemize charges for those supplies.
View your base rates
Click Settings on the navigation bar.
Click the Charges tab.

Changing rate amounts
Use the Charges page anytime you need to adjust rates for your services, mileage, or supplies.
- Click Settings on the navigation bar.
- Click the Charges tab.
- No categories defined: If you did not add a category, the base rates display. Click the edit icon on the upper right.
Categories defined: If you created one or more categories, the Charges pages opens with a list of all the configured rates, both Universal and categories. Click View to select the category you want to change and then the edit icon. (Remember, your base rates will be under the Universal category.) After you select the category, click the edit icon on the upper right.
- Enter the new price per unit.
- Scroll down to the bottom of the page and click Save.
Setting future Universal rates
You can enter Universal rates that will start in the future (effective date). The system will continue to use the existing rates until the effective date.
Setting future base rates – no defined categories
- Click Settings on the navigation bar.
- Click the Charges tab.
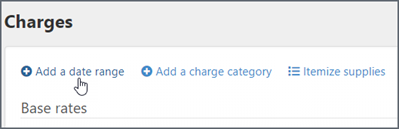
- Click Add a date range.
- Enter the effective date (starting date).
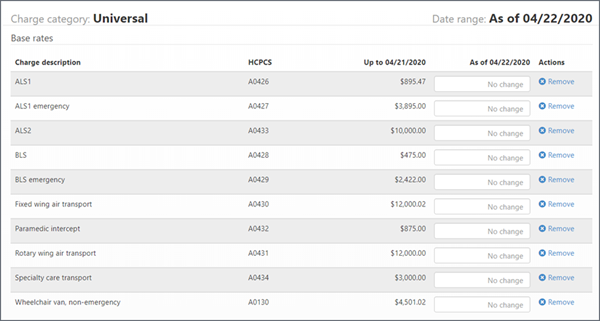
- Click Continue.The next page displays the existing charge rates by HCPCS.
-
For each HCPCS:
-
If you do not enter an amount in the new date range column, the rate will be unchanged.
-
If you enter a new rate in the field, the rate will take effect on the new date.
-
A zero rate is valid.
-
If your company is no longer providing the service or supply, click Remove.
-
-
Scroll down and click Save.
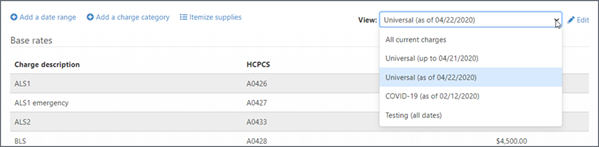
Now, when you click View, you will see multiple Universal categories - one with a termination date (up to) and the other with a start date (as of).
Setting future base rates – with define categories
- Click Settings on the navigation bar.
- Click the Charges tab.
- Click the View field and select the Universal category.
- Click Add a date range.
- Enter the effective date (starting date).
- Click Continue. The next page displays the existing charge rates by HCPCS.
- For each HCPCS:
- If you do not enter an amount in the new date range column, the rate will be unchanged.
- If you enter a new rate in the field, the rate will take effect on the new date.
- If your company is no longer providing the service or supply, click Remove.
- Scroll down to the bottom of the page and click Save.
Click the View field to see the existing Universal category and the one set to start in the future.
Working with categories
Not every company will need to create a category. You’ll only want to create one if the rates you are charging for a specific type of trip is different from your universal rates. If this is not the case, you will be fine working with just the universal rates.
If you do need to work with categories, this is how you create and delete one. We will also cover how to setup a category with a date range.
Creating a category
- Click Settings on the navigation bar.
- Click the Charges tab.
- Click Add a charge category.
- Add the category name.
- If this category is ongoing, you do not have to put in an effective or end date. The system will automatically assign all dates to the category.
- Click Continue.
- Enter values (your rates) in the "Price per unit" fields and modify the HCPCS description.
- Scroll down to the bottom and click Save.
Changing category rates
- Click Settings on the navigation bar.
- Click the Charges tab.
- Click the View field and click the category name.
- Click the edit icon.
- Enter the new rates.
- Scroll down to the bottom of the page and click Save.
Deleting a charge category
- Click Settings on the navigation bar.
- Click the Charges tab.
- Click the View field and select the category.
- Click the edit icon next to the category name.
- Click Delete charge category.
- Click Delete on the confirmation window.
Setting up categories with date ranges
You can use categories to set rates that will be applicable for a set period. For example, your company is going to help a company in their region for a one-month period. Because the charges for these trips will be different from your Universal rates, you can enter the special rates in a category that starts and ends on dates you select. Let’s see how that’s done.
Note: For the Universal category - You cannot set both a starting and end date for the Universal category. For this category, you can set a start date of when you want new rates to take effect, or an end date of when you want rates to end.
You must create the charge category before you add a date range.
- Click Settings on the navigation bar.
- Click the Charges tab.
- Click in the View field and then select the name of the category.
- Click Add a date range.
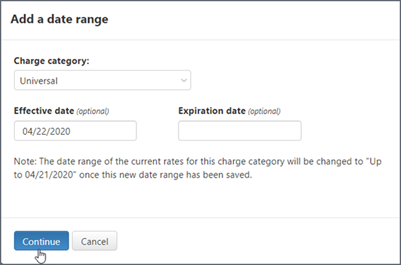
In the "Add a charge category" window, the category name populates in the "Change category" field.
- Effective date: Click to select a date from the calendar.
- Expiration date: Click to select a date from the calendar.
- Click Continue.
- Go down the list and enter the rates in the "Price per unit" field.
- Click Save.
You can now apply this category to the charges tab for any trip that has a service date that falls within the category’s starting and ending dates.
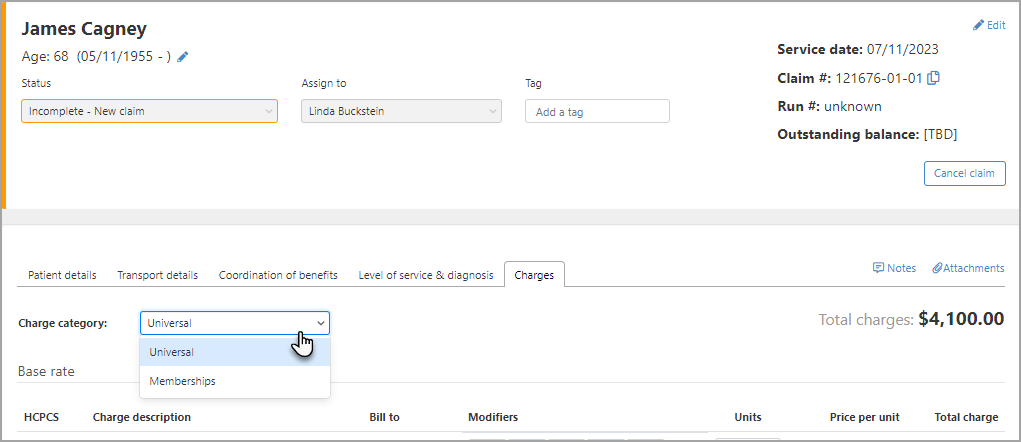
Applying a category to a claim
The process for applying a category to a claim is the same regardless of where the claim is in its lifecycle. You can apply a category to a claim during claim creation, when the claim is suspended, and after the claim was submitted.
On the Charges tab, click the Charge category field and select the category. The category rates will be applied to the HCPCS for the claim.